
Knee-Wall Before New Air Sealing
This is the knee-wall area above the master bedroom. The lack of air sealing here was a major factor in the room losing heat.
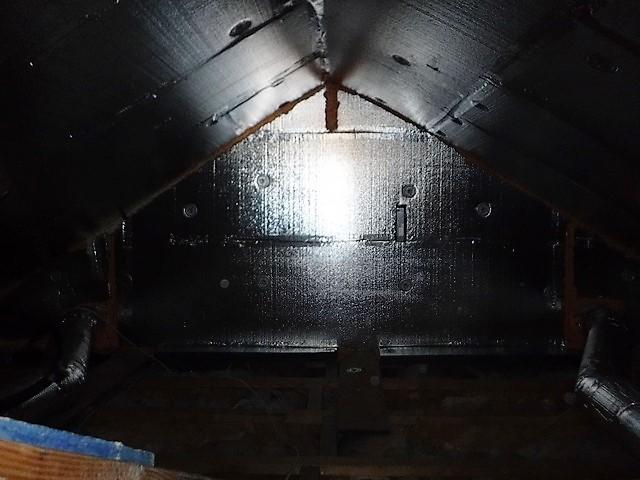
Foam Board Insulation in Knee-Wall
In order to air seal the knee-wall area, we installed 2" of SilverGlo polysio foam board on the roof slopes and gable ends. This will ensure a comfortable bedroom for this homeowner.

Crawl Space Before Sealing
Here is the crawl space before we did any work. As you can see, part of it is still an uncovered, dirt floor. Without a vapor barrier, this space can evaporate gallons of moisture into the home everyday. This kind of moisture can cause structural failure, mold and mildew, and electrical issues.

Crawl Space Air Sealed With Vapor Barrier
Here we have installed our vapor barrier. We make sure that it extends at least 6-12" up the walls and is sealed at the walls and seams with spray foam.

Air Sealed Crawl Ceiling
In addition to installing a vapor barrier, we also installed 3" of closed cell foam insulation into the crawl ceiling. This will both seal and insulate the area.